
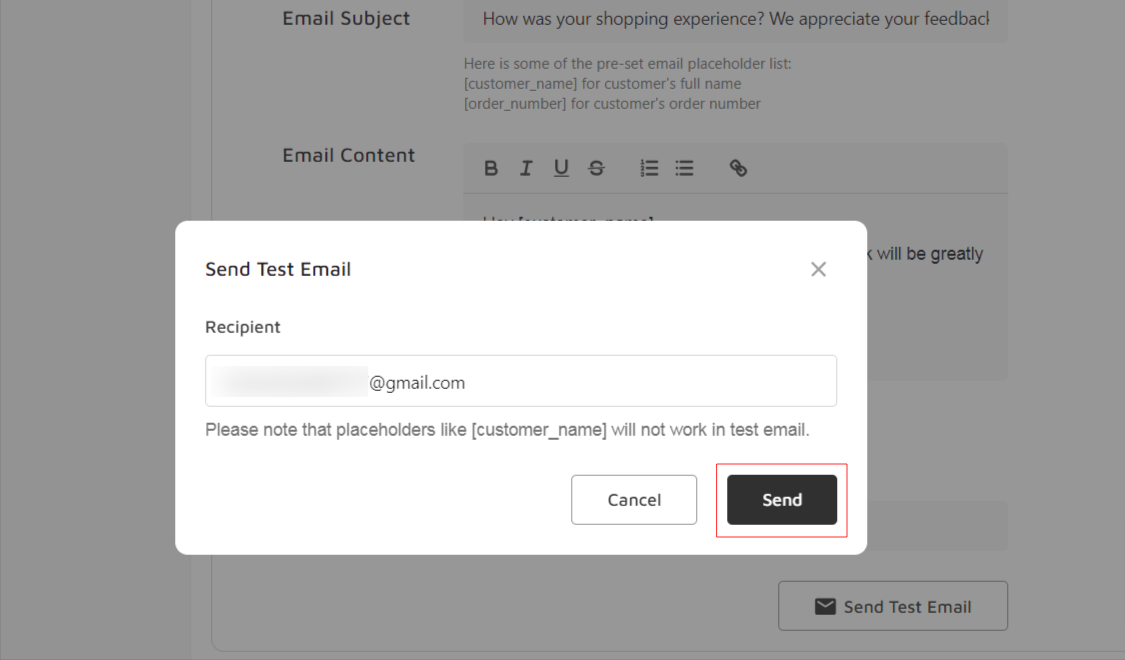
Sending test emails is as easy as sipping tea. After you have set up the email contents of any type of request emails, You will find a button next to the Save button named Send Test Email. Click on it and assign an email where you want the test email to be sent.
Here are the steps you can follow to set up and send a test mail in ReviewXpo.
Step 1: From Shopify admin, open your ReviewXpo App “Menu” and click “Collect Reviews”.

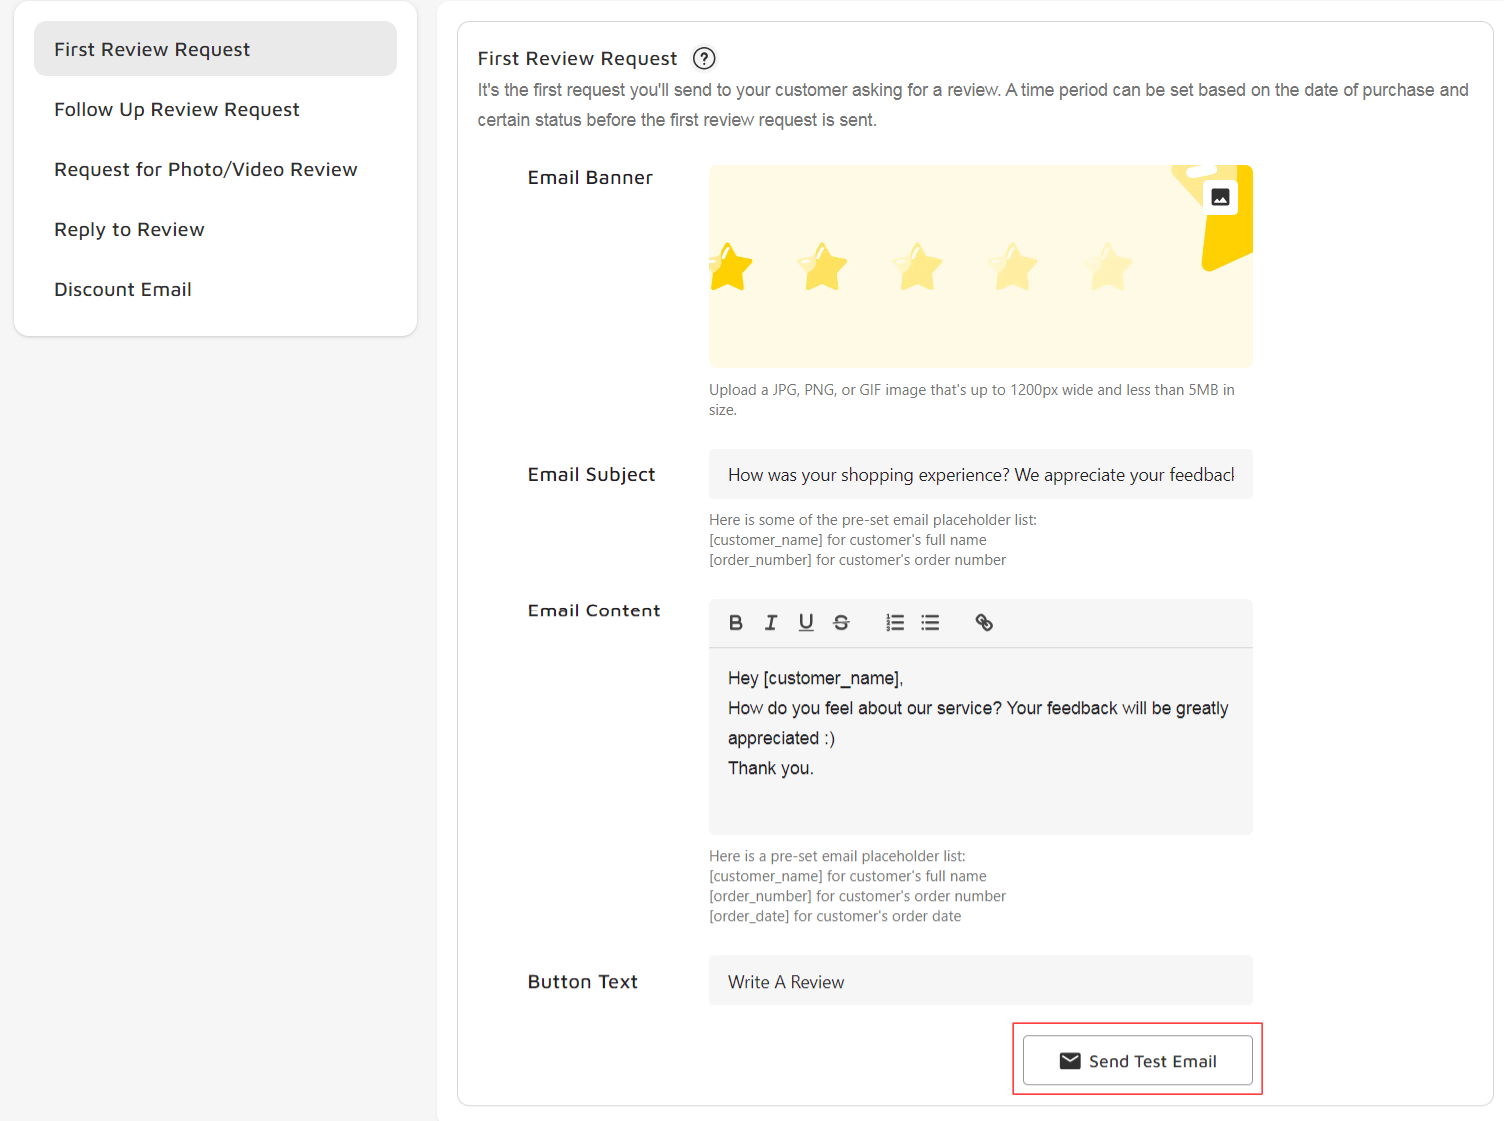
Step 2: Select “Email Content” and Click on your preferred option (“First Review Request”, “Follow Up Review Request”, “Request for Photo/Video Review”, “Reply to Review”, “Discount Email”).

Step 3: Update the content (i.e, Email Banner, Email Subject, Email Content, Button Text) to your preference and click “Save”.

Step 4: Click “Send Test Email”.
Step 5: Finally, add the email address you want to send the test email to and click "Send". You will receive the test email in that email inbox.
That's all you need to do to send a test mail. Hope you found this article helpful. If you need any assistance or have any questions, Feel free to reach us via the live chat. Thanks!