
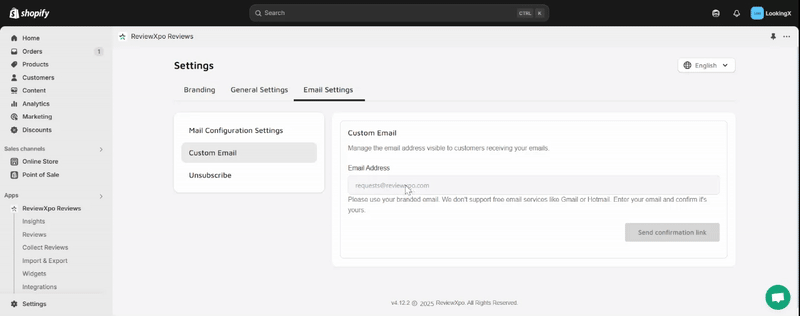
ReviewXpo’s Custom email feature lets you customize the sender email to your organizations name. Here's how you can do it:
Step 1: Go to Settings > Email Settings and Select 'Custom Email'. Enter your desired domain mail. (You can not use public emails i.e @gmail, @hotmail etc).
Make sure the Review Request feature is enabled. Go to Collect Reviews > Reminder Setting and enable the First review request.
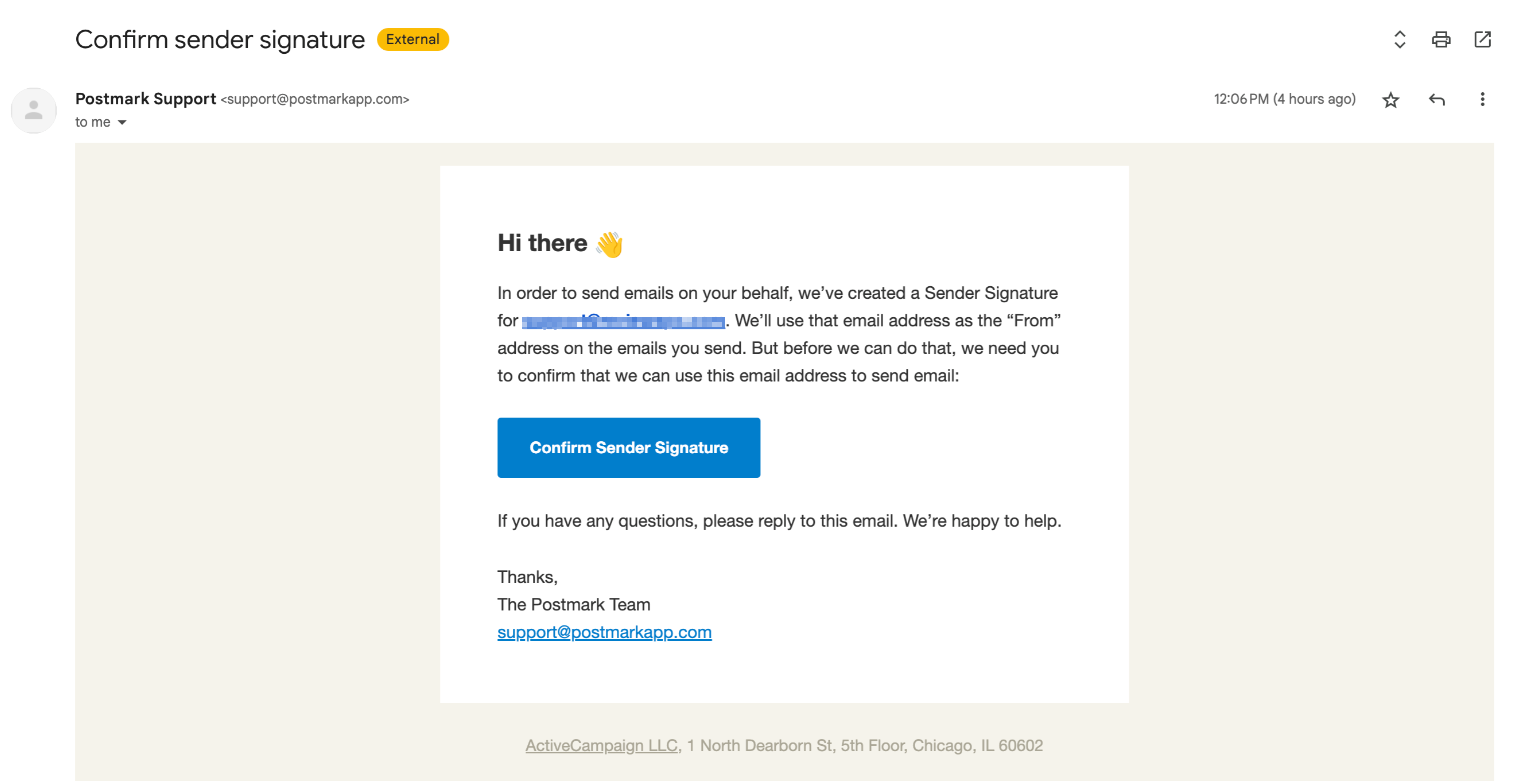
Step 2: Verify your email address. The confirmation link will be sent to the email you provided.
Step 3: Once the email has been verified, you can send review requests to your customers and the sender email will be the one that you provided and verified.

Important Note: It’s important to Add the following URL’s to your DNS records so that the review request emails don’t end up in the customer's spam bin.
Here’s how you can do it:
The DKIM records will be added as TXT records, and Return-Path records need to be added as CNAME records. In most cases, the DNS management option will be available with the hosting provider. However, in a few cases, the DNS is managed by the domain provider.
Once you have the DKIM and the Return-path records generated from the CallHub team, you may navigate to the link of your hosting provider listed below for step-by-step instructions on setting up the DNS records.
- Google Domains
- Linode
- SiteGround
- Bluehost
- CloudFlare
- DNS Made Easy
- DNSimple
- Dreamhost
- DigitalOcean
- GoDaddy
- Hostgator
And if you need any help at all or have any questions, feel free to reach us via the support chat.