Average Rating badges are essential to showcase social proof of your store’s products. Here’s how you can customize and set up the rating badge.
So let’s get started and please follow these simple steps;
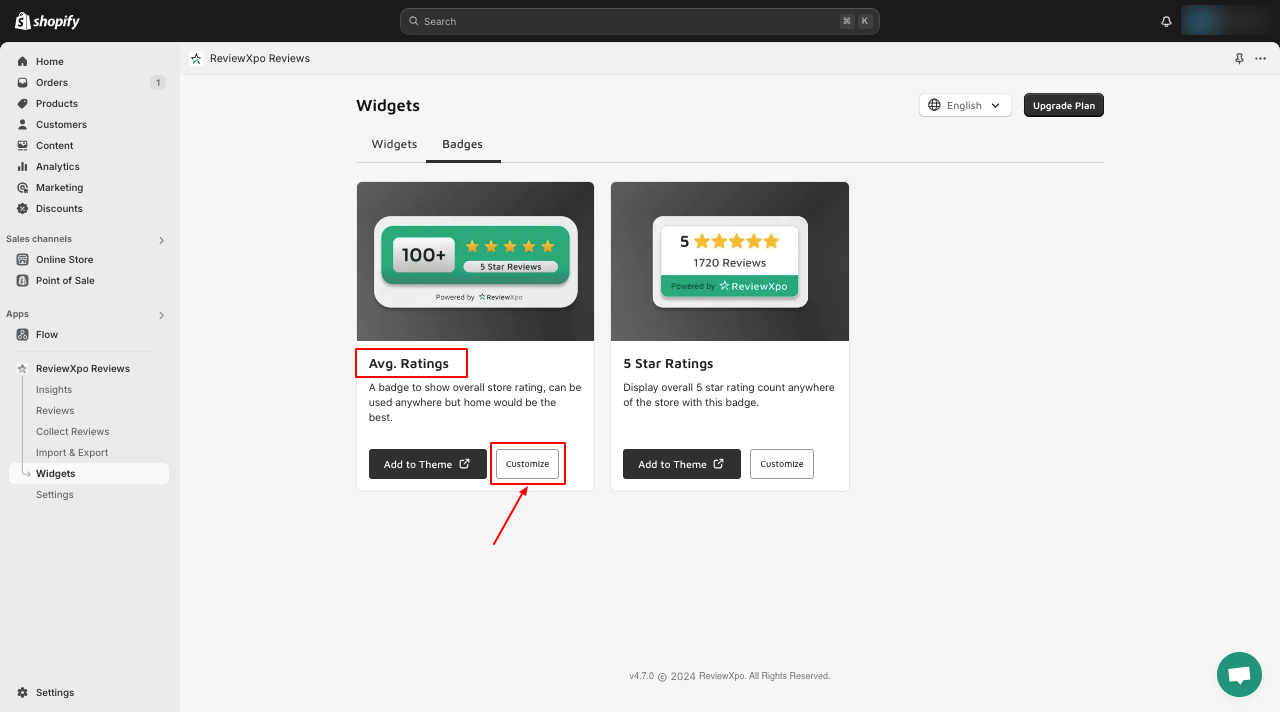
Step 1: From Shopify admin, open your ReviewXpo App "Menu" and click "Widgets".

Step 2: Select "Badges".

Step 3: Now, select the "Avg. Ratings" widget and click on Customize.
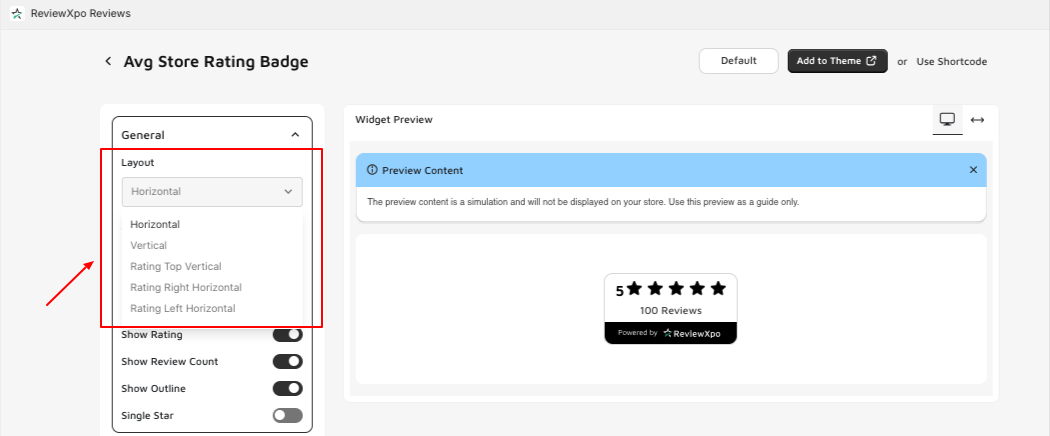
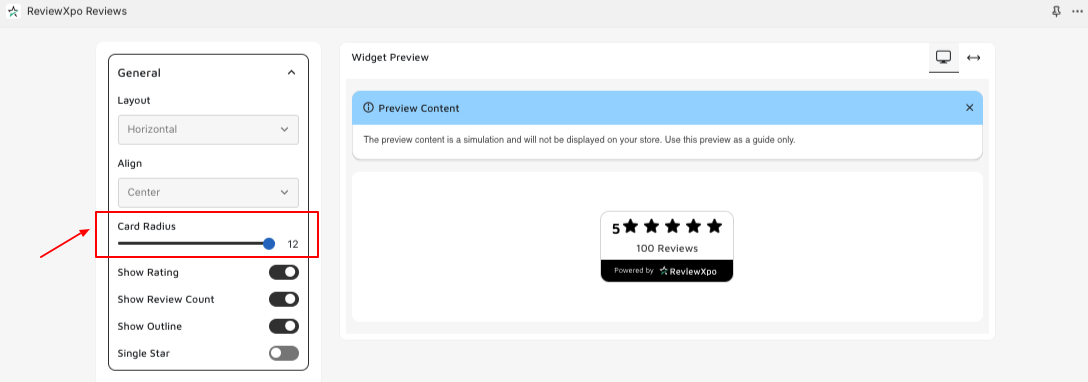
Step 4: You will see a customization panel on the “Avg Store Rating Badge” multiple function section, where you can design the badge to your preference, and a Widget preview panel on the right that will showcase the design.

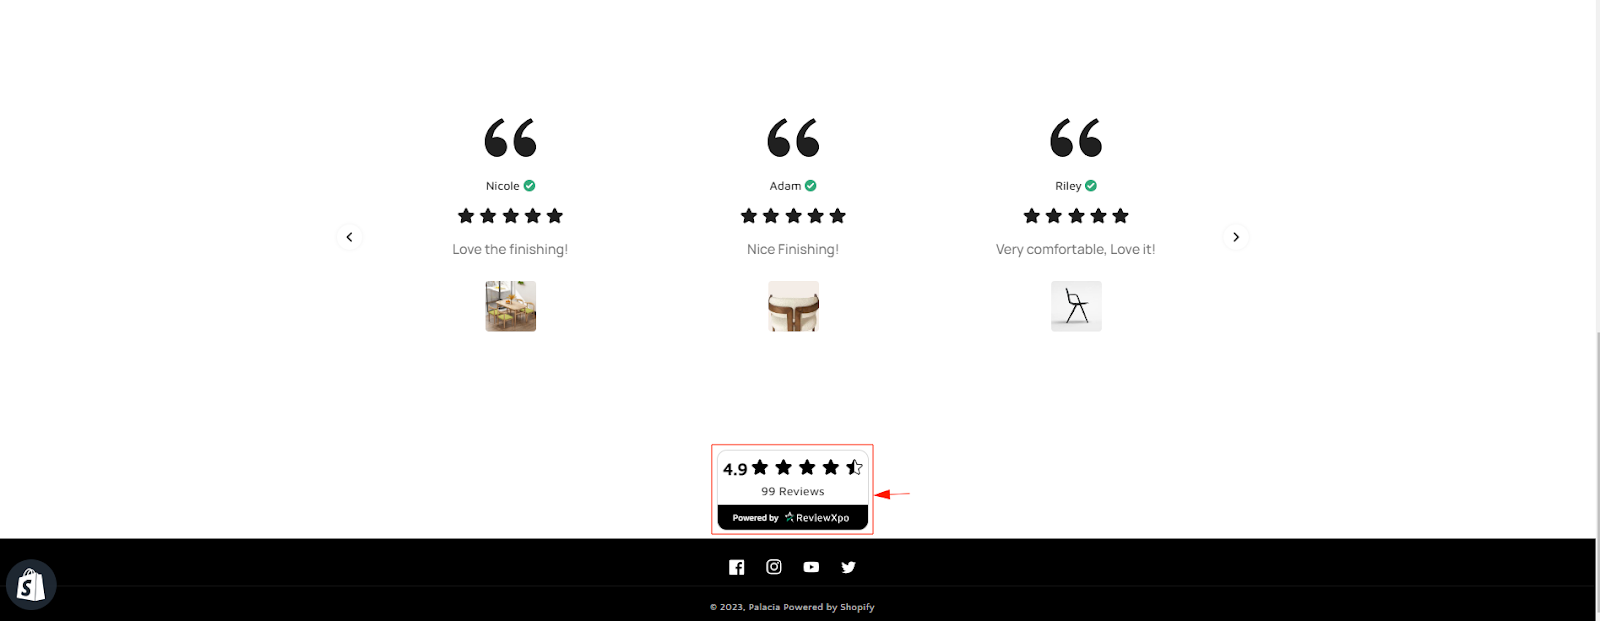
In the "Avg Store Rating Badge" section, you can set the “Layout” display of the rating number to be horizontal or vertical on the top, left, or right.
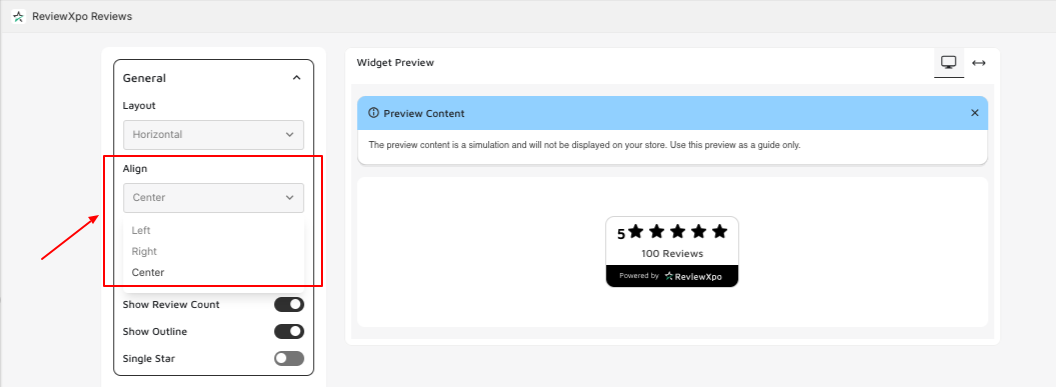
You can set the alignment of the badge widget to the top, left, or right using the “Align” feature.
You can set the radius of the badge using “Card Radius”
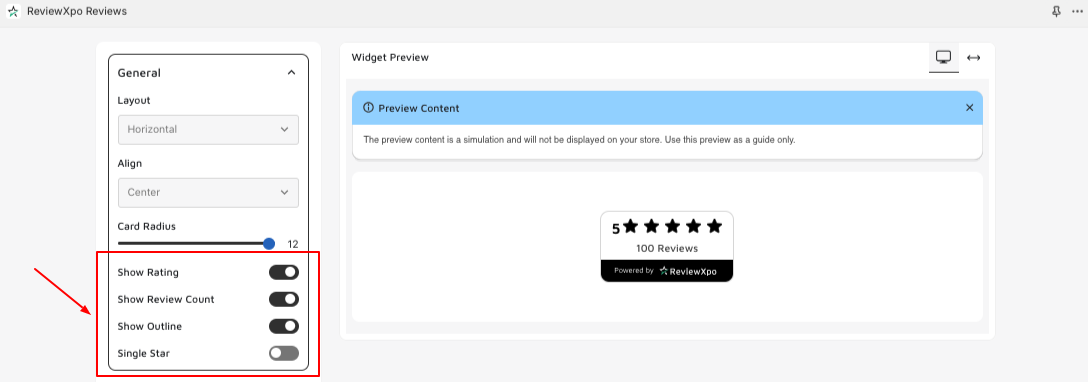
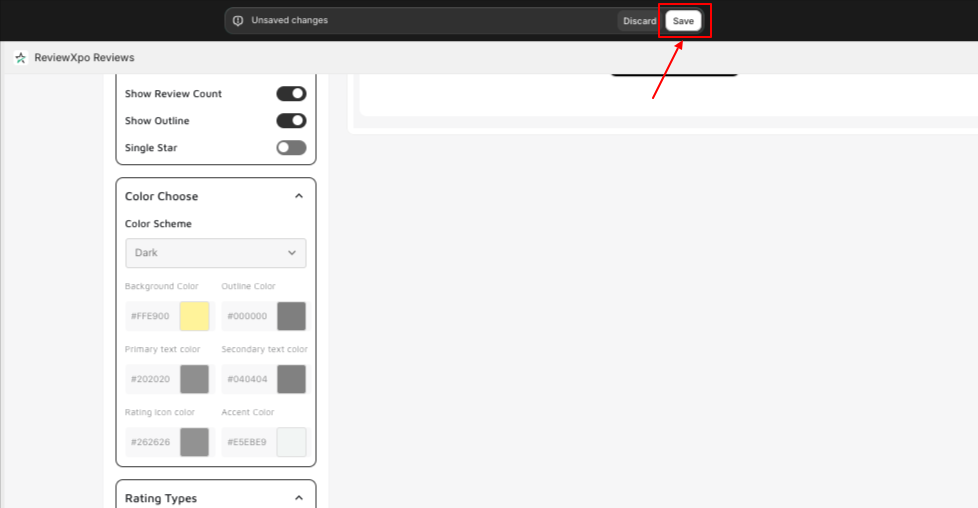
You can choose to show or hide the rating number using the “Show Rating” toggle, with the “Show Review Count” toggle, you can show or hide the total number of reviews, if you want to show outlines over your badge widget, enable the “Show Outline” toggle and if you're going to show just one star instead of five, just turn on the “Single Star” toggle.
In the “Color Choose” section: On the “color scheme” section, you can set if you want the theme of the badge widget to be Dark, Light, or Design it to your preference by setting it Custom.
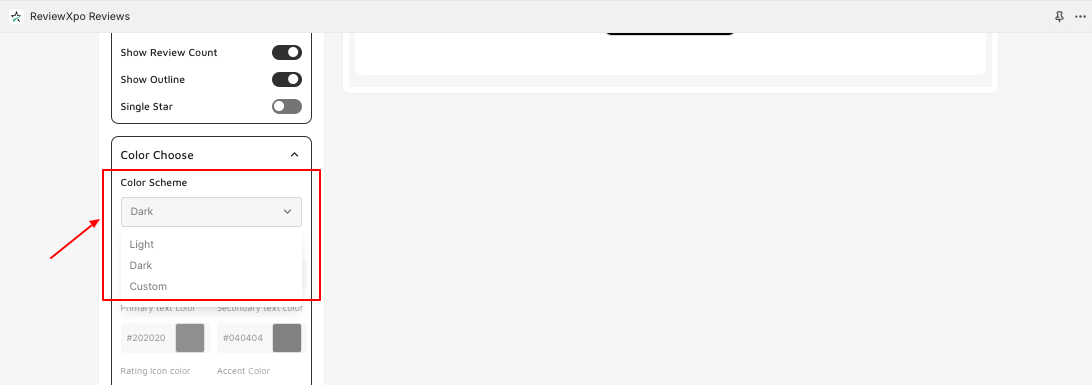
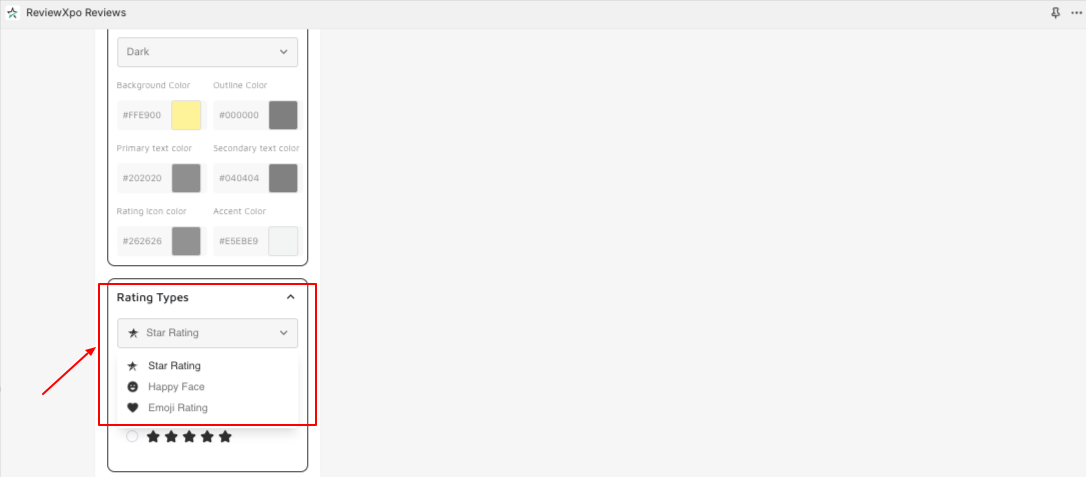
After Setting the theme to Custom:
- You can customize the background color of the badge widget.
- You can customize the Outline color of the badge widget.
- You can customize the primary text color of the badge widget.
- You can customize the secondary text color of the badge widget.
- You can customize the rating icon color of the badge widget.
- You can customize the accent color of the badge widget.

In the “Rating Types” section, you can set the types of rating stars (i.e. Star Rating, Happy Face, Emoji Rating) you want to display on the badge widget by selecting the drop-down menu bar.
You can set the name of the label to your liking by editing what you want to put on the label of the badge widget in the text field of the “Label” section.

Step 5: After you are done customizing, click on “Save”.
Now let’s show you how you can add the Average Rating Badge to your store.
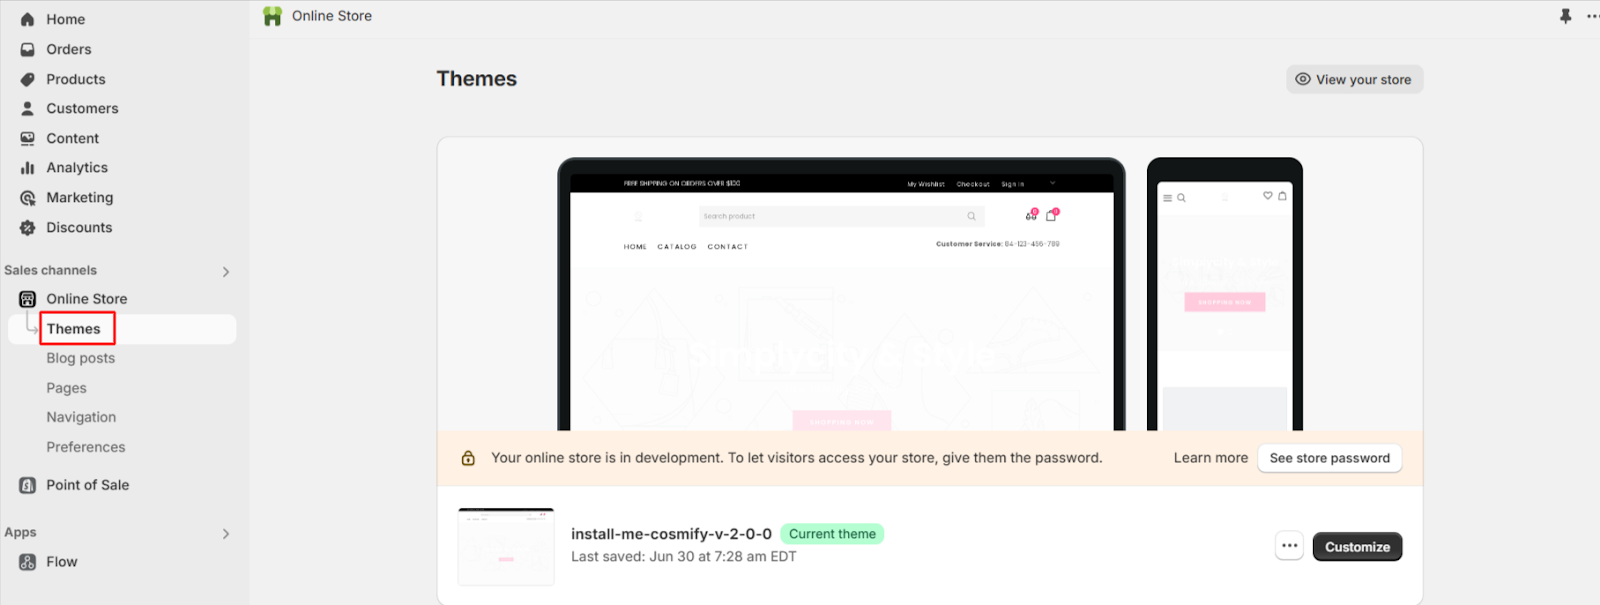
Step 6: Go to the “Themes” section on your Online store.
Step 7: Select the “Customize” option on your current theme.

Step 8: Select “Add Block” of the section where you want to add the badge widget.
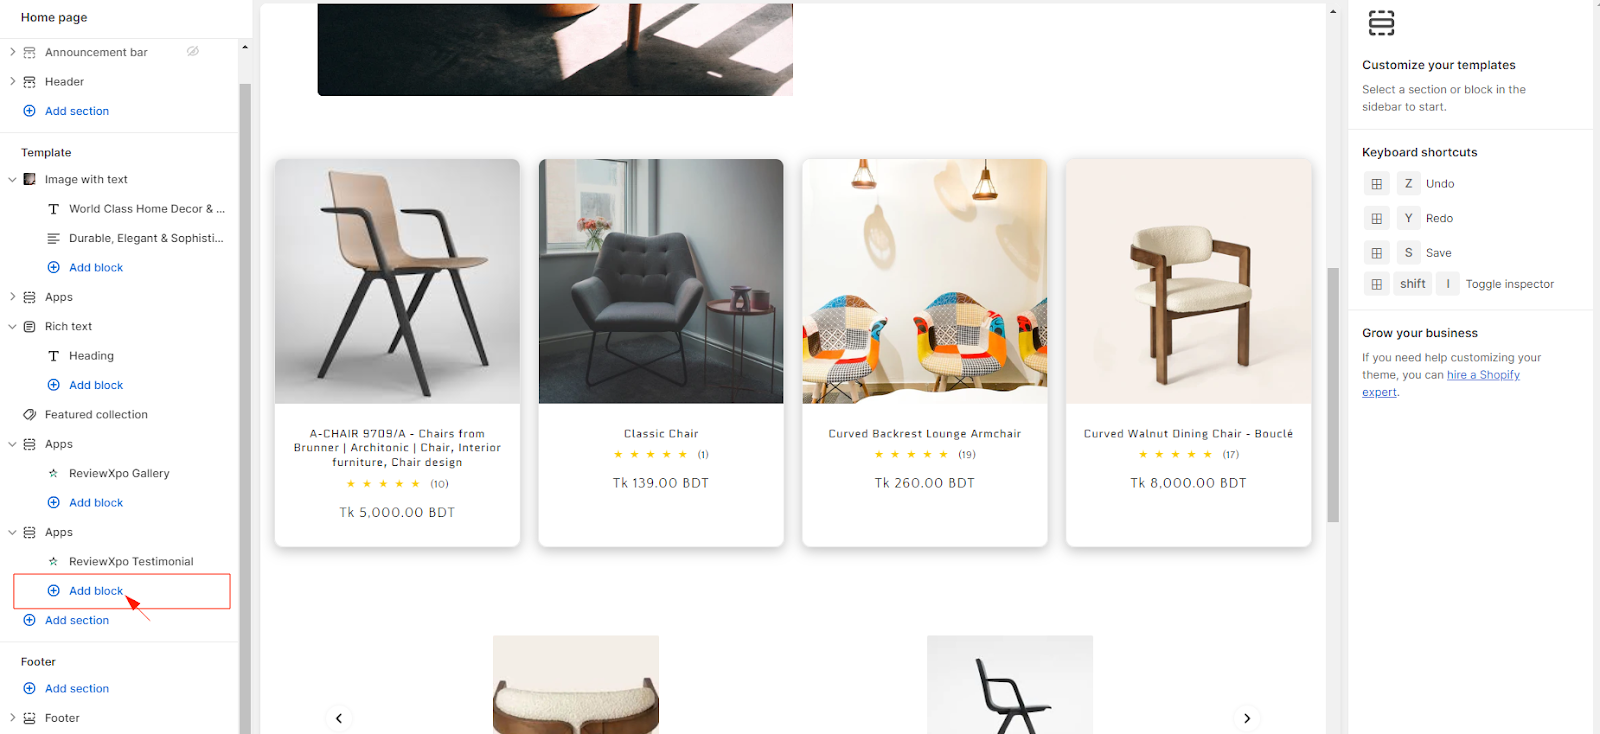
Step 9: Select “ ReviewXpo Rating Badge”.

Step 10: Set the badge where you want to (1) and click “Save” (2).
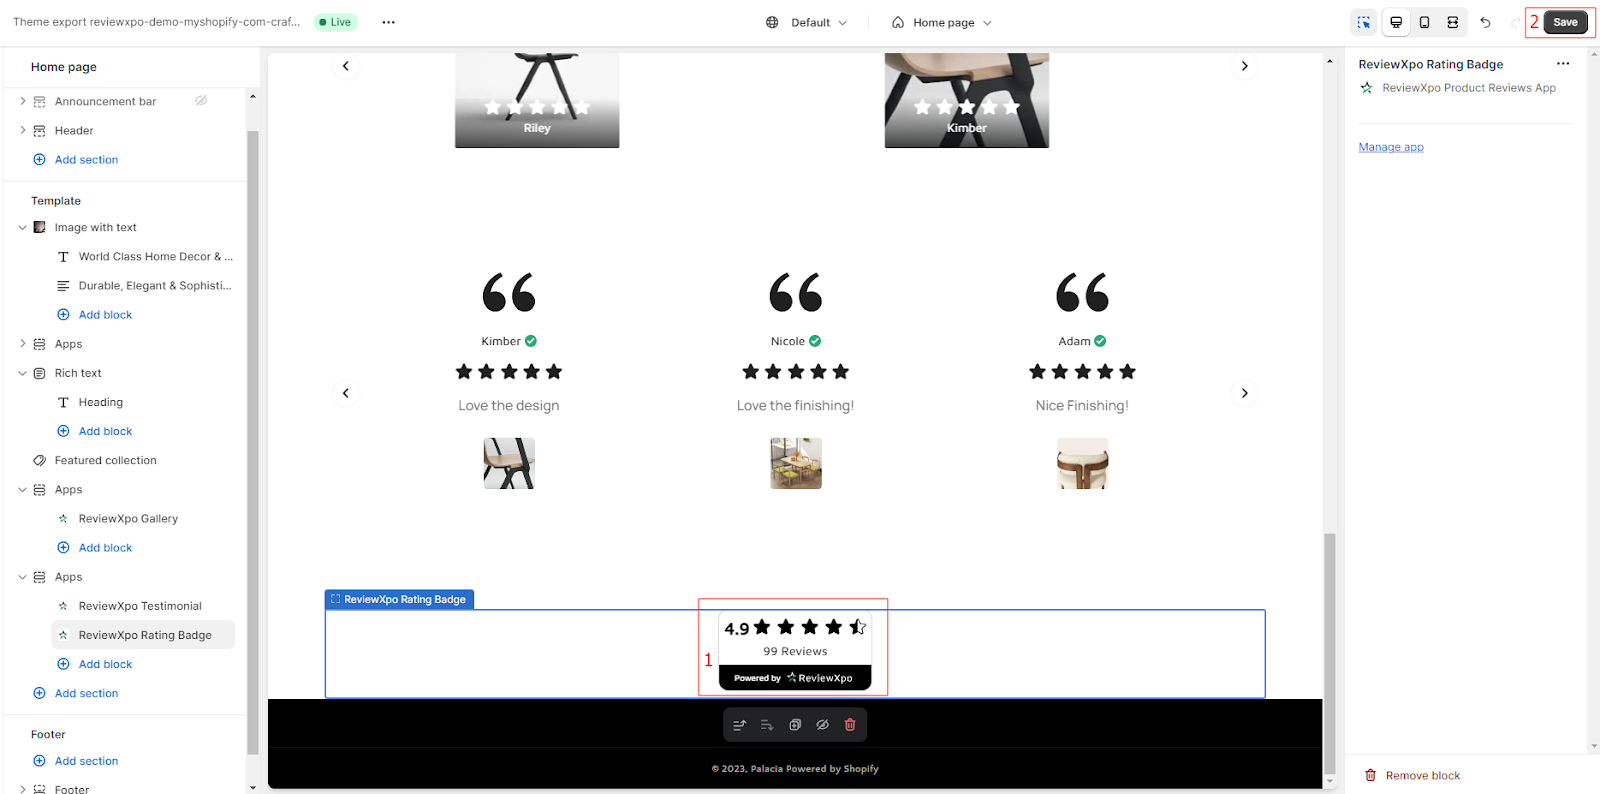
The Average Rating Badge can now be seen in your Shopify store.
Hope you found this article useful. If you have any queries, feel free to reach out and contact us over the live chat.